Table of Contents
Free Support
We provide Free Customer Support for all Curly Themes products through our quick and easy ticket application interface. Please limit your inquiries to problems related to the Image Comparison Plugin, its setup and features. For any problems concerning third-party plugins you should address the application’s developer.
Note: We can not offer support for custom CSS code customization. You should ask a professional developer for aid if you require help with advanced customization and programming.
Curly Themes offers a free ticket support application for all clients, through a real-time license code automatic verification. The dedicated app is fast and easy to use and includes an email notification feature. We will let you know as soon as your inquiry has received an answer. Thanks to our modern design, you can also upload images as an attachment to your support ticket.
Before writing a ticket please get your Purchase Code and your License Certificate:
Before opening a new ticket, please make sure you have read through all our documentation. Also, our FAQ section contains helpful answer to questions we often receive from our customers. Following these steps is in the users’ interest, as they will save valuable time. Still, we are always happy to respond to any inquiries you may have related to the Image Comparison Plugin.
Installing the Plugin
image-comparison-login
Before installing this plugin, you need to have a WordPress platform already installed on your server. You can download it from WordPress.org, if you don’t have it already.
If you do not know how or you have problems with the installation, you can access helpful information at:
Once you have a working WordPress on your server, you have two available ways to install this plugin.
FTP Upload
- Step 1 – Unzip the .zip package file you downloaded from Code Canyon and locate the folder named image-comparison
- Step 2 – Upload this folder on your server in your WordPress directory to /wp-content/plugins/
WordPress Upload

image-comparison-upload
The second way to install the plugin is by logging in from your website’s http://yourwebsite.com/wp-admin/ to the WordPress Dashboard and:
- Step 1 – Go to Appearance > Plugins > Add New > Upload
- Step 2 – From there, you should select the file images-comparison.zip from your computer
- Step 3 – After clicking the Install Now button, the installation process is finished
- Step 4 – After installing the plugin is recommended to activate it by clicking Activate Plugin
Activating the Images Comparison Plugin
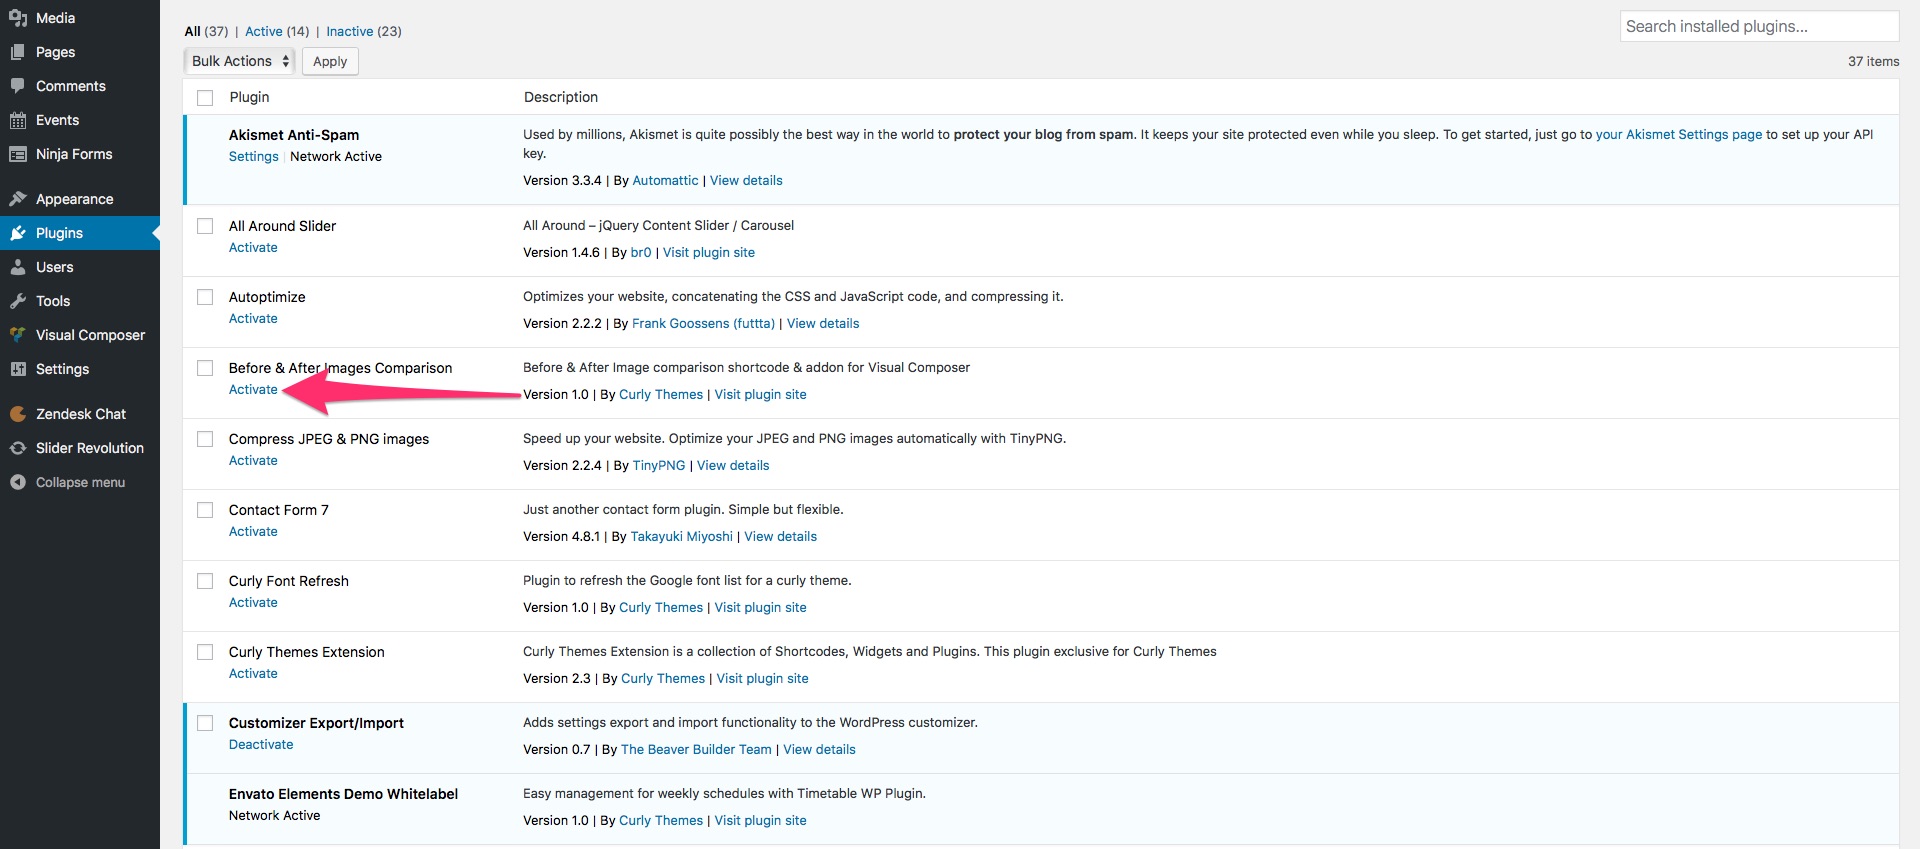
images-comparison-activation
After you have completed the install process, in either of the two ways, you need to activate it in case you didn’t already in the WordPress installation method.
Log in to the WordPress Dashboard, go to Plugins >Installed Plugins and select Images Comparison Plugin. Click the Activate button and you can start using the plugin.
Shortcode Usage
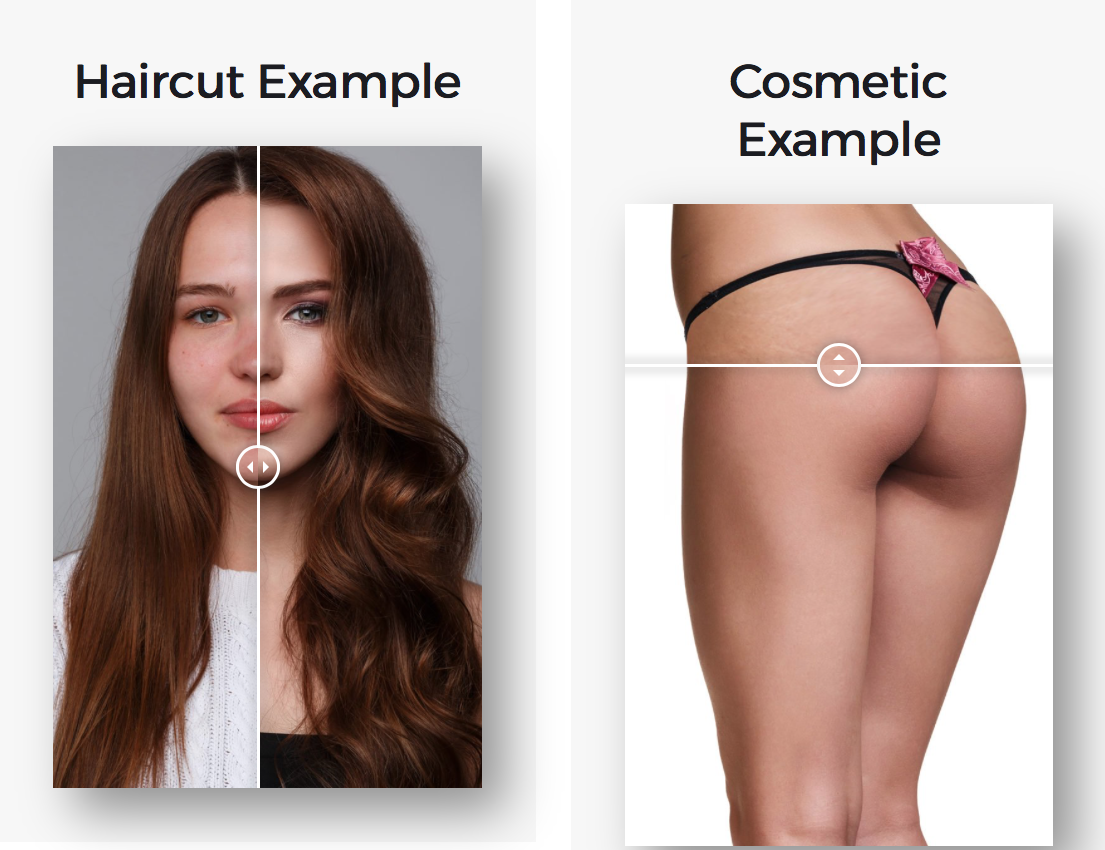
If you need a simple images comparison display, with just the two photos, side by side, this simple shortcode does the trick:
[images-comparison image_1="http://www.curlythemes.com/image1" image_2="http://www.curlythemes.com/image2"]
If you wish to choose the way your images are compared, horizontal or vertical, you need to use the orientation parameter. Horizontal means your comparison point will move left and right between images. Vertical means your comparison point will move up and down between images. Default is horizontal.
[images-comparison orientation="vertical" image_1="http://www.curlythemes.com/image1" image_2="http://www.curlythemes.com/image2"]
If you wish to change the position of your comparison point between the two images, you can use the default_offset_pct parameter. It can have a value between 0 and 1. This defines how far, in percentage, the point will be from the left margin (horizontal orientation) or top margin (vertical orientation). For example: 0.5 means 50% from the margin, 0.3 means 30% from the margin, 0.8 means 80% from the margin. Default is 0.5.
[images-comparison orientation="vertical" default_offset_pct="0.4" image_1="http://www.curlythemes.com/image1" image_2="http://www.curlythemes.com/image2"]
If you wish to add labels for your photos, you can use the before_label and after_label parameters. The before label is for image 1 and the after label is for image 2.
[images-comparison before_label="Before" after_label="After" image_1="http://www.curlythemes.com/image1" image_2="http://www.curlythemes.com/image2"]
If you wish to add CSS classes for the element, you can use the el_css parameter. You can add classes separated by commas.
[images-comparison el_css="class_css" image_1="http://www.curlythemes.com/image1" image_2="http://www.curlythemes.com/image2"]
VC Element Usage
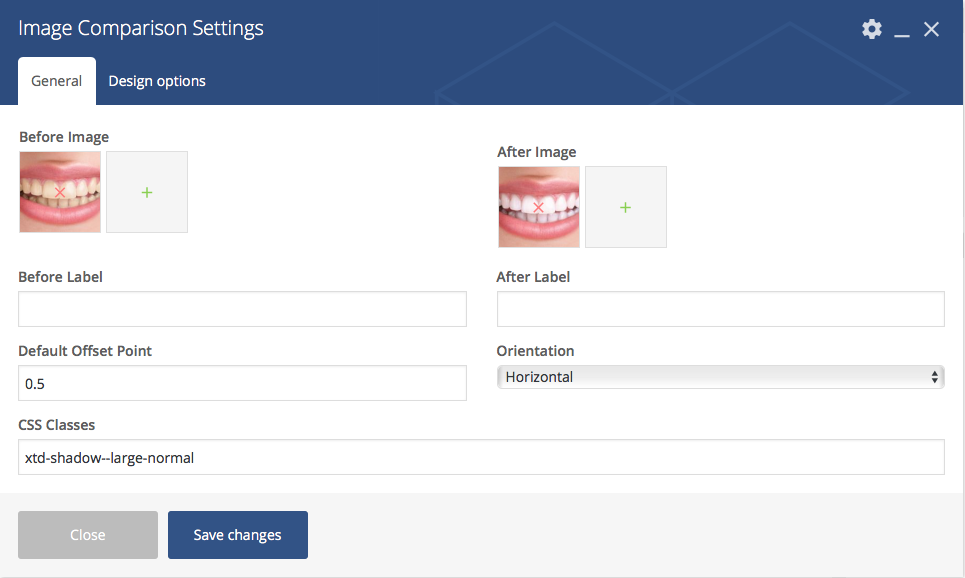
To add the Image Comparison Visual Composer element in your page, you need to click on the + Add Element button of the VC builder and, from the elements list, select Image Comparison. You can then customize it with the following options:
Image Comparison Settings:
- Before Image – Use this option to upload the before image.
- After Image – Use this option to upload the after image.
- Before Label – Type in the label for the before image.
- After Label – Type in the label for the after image.
- Default Offset Point – Type in the starting comparison point between images. It can have a value between 0 and 1. This defines how far, in percentage, the point will be from the left margin (horizontal orientation) or top margin (vertical orientation). For example: 0.5 means 50% from the margin, 0.3 means 30% from the margin, 0.8 means 80% from the margin.
- Orientation – You can use this select box to choose how you wish to compare the images. Horizontal means your comparison point will move left and right between images. Vertical means your comparison point will move up and down between images.
- CSS Classes – Use this field to add custom CSS classes.
FAQ
1. I want just a basic image comparison display, just two images side by side. How do I do that?
You can use the shortcode:
[images-comparison image_1="http://www.curlythemes.com/image1" image_2="http://www.curlythemes.com/image2"]
or you can use the Visual Composer element.
2. Can I compare images top to bottom?
Yes, you need to use the following shortcode:
[images-comparison orientation="vertical" image_1="http://www.curlythemes.com/image1" image_2="http://www.curlythemes.com/image2"]
or you can use the Orientation option from the VC element.
3. How can I move the default comparison point?
You can change the Default Offset Point in the VC element or add the parameter in the shortcode:
[images-comparison orientation="vertical" default_offset_pct="0.4" image_1="http://www.curlythemes.com/image1" image_2="http://www.curlythemes.com/image2"]
4. Which values can I add for the offset point?
The value of the offset point is defined with a number between 0 and 1. In percentages, a 0.5 value means the point will be at a 50% distance from both margins. A 0.3 value means the point will be at a 30% distance from the left/top margin and 70% distance from the right/bottom margin.
5. Can I add my own CSS?
Yes, you have a dedicated field in the VC element and a parameter for the shortcode:
[images-comparison el_css="class_css" image_1="http://www.curlythemes.com/image1" image_2="http://www.curlythemes.com/image2"]
Release Notes:
- Image Comparison Plugin 1.0 (August 15, 2017)
Initial Release